top of page
On this page:
Exercise 1: Follow Along
Exercise 2: Motion Tracking 2D
Exercise 3: Motion Tracking 3D
Follow Along
follow-along-motion
Learning Motion Tracking from home is so tough. I was struggling as once I went off Teams to work on my footage and come back, suddenly I miss the important parts.
Precision
One key takeaway was the importance of precision in point placement, as minor discrepancies could lead to significant variations in tracking accuracy. For the first exercise we did tracking of the phone so that we can place whatever clips we want in the "green screen". It's important to adjust the points frame by frame as the auto-tracking tends to shift out of place.

Screenshot of tracking points
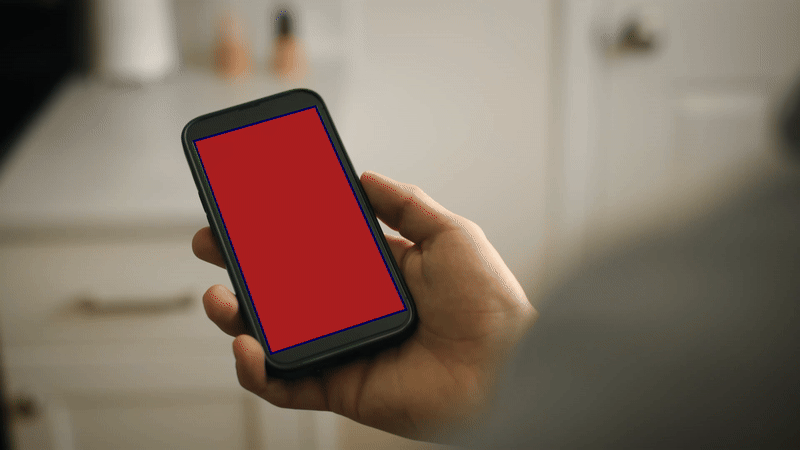
Not the most perfect but pretty proud of my first attempt!
2-point
2 Point
Motion Tracking
Exercise
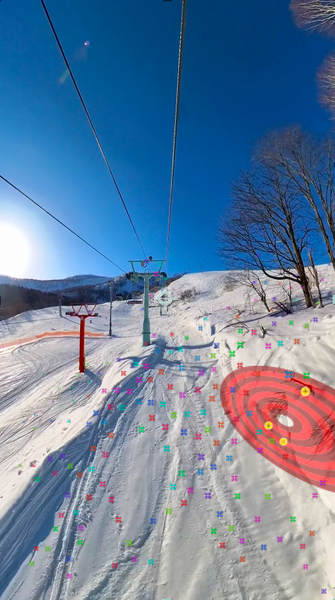
I decided to use my footages from Japan trip as my house was a little occupied. There are a bunch of skii-ers who were making down the bottom of the slope. I decided to try to track one of them and add a little "wheee" animation.
One of the key challenges was selecting a clear reference point on the skier to ensure consistent tracking. Thankfully the skier was moving at a not-so-fast pace and changing direction slightly, the tracker could be adjusted at certain points to maintain accuracy. Unfortunately as I was writing this I realised that I had forgotten to save my After Effects file for this exercise.
Challenge: "Whee" text did not go out of the screen when the skier left the frame
I had to cut the video to hide this little error. I realised that this happens because Motion tracking in After Effects relies on visible pixels. If the skier exits the frame, After Effects has no reference point left to track, so the motion stops at the last tracked frame.
Fix: I could fix this by manually adding key frames for the text layer's position so that it gradually moves off-screen after the skier disappears.
3d-tracking
3D Tracking
Exercise
For this 3D motion tracking exercise, I used a footage that I took when I was on the ski lift in Japan. This scene was interesting because it provided a naturally moving perspective, making it a great test for 3D tracking. The After Effects' 3D Camera Tracker generated a set of tracking points.

Analyse Motion
Analyse Motion
The first step to analyse motion and extract camera motion. I switched on the 3D camera tracker by clicking on Effect > Perspective > 3D Camera Tracker. Once done, The 3D solved track points appears as small colored x's. I could then use these track points to place content into the scene. A little target board will appear and I could place it to determine where I would like my content to be placed. As I hover between three neighbouring unselected track points, a red target appears, showing the orientation of the plane in 3D space.
Red Target Appears
Attach Content
I then chose the type of content to create, I decided to add a "Japow" text. I also adjusted the size of the text accordingly so that it fits the scene.

Another Japow

Size Adjustment
Final Footage
The final result was a floating "Japow" text element that felt anchored in the 3D space, maintaining its position as if it were physically present in the environment. This experiment reinforced the effectiveness of 3D motion tracking for adding interactive digital elements to real-world footage.
bottom of page