top of page
On this page:
Case Design
Animation
Final
case-design
Case Design
The trial and errors were part and parcel of product design so here's a documentation of our failures and sucesses. There were a bunch of scrap acrylic at the back the class from the seniors so we took the 2mm and 3mm ones to prototype.

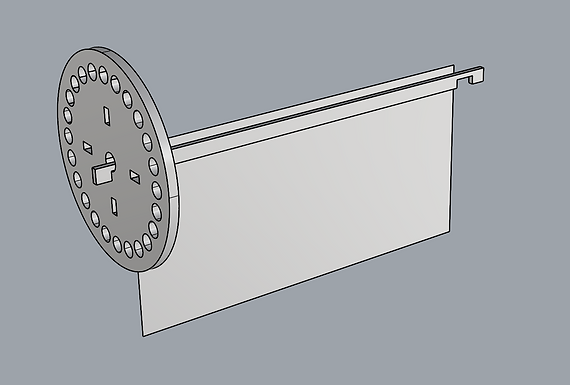
Rhino Workspace
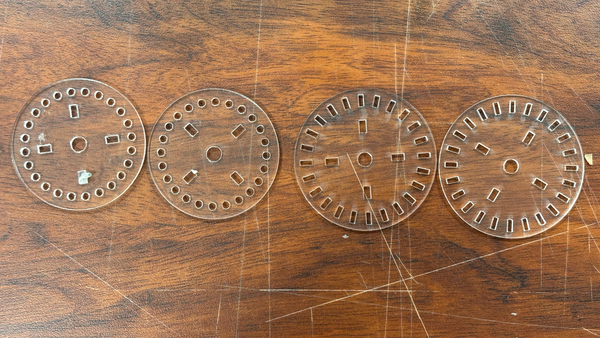
End Caps
I started by designing the end caps as this was the most crucial part of the flipbook. So I know that we were going to work with 24 frames so basically to array the smaller circles around the end caps, I drew one circle and then arrayed as such:
1. I selected the center of the circle as the center point and the larger circle as the reference point.
2. I rotated at 15 degrees and voila.

Variations
I was wondering if it would be better to do rectangle slots instead of circular slots so I designed a variation to try out. I later found out that circular slots work better so that the frames can rotate within the slot allowing each frame to flip. The rectangular slots were too tight for the frames to rotate about.
Lasercut Time
Post Lasercut
I had to cut the end slots and redesign it a couple of times as I had to redesign the spindle body a couple of times... so onto the spindle story.
Spindle
The spindle took awhile, I made a mistake by assuming that they will fit but unfortunately... they became misaligned so the first few drafts failed. After the nth cut and trimming lengths where necessary, we have the final draft.
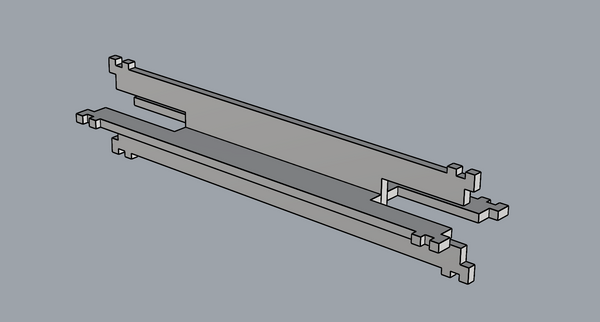
In Rhino
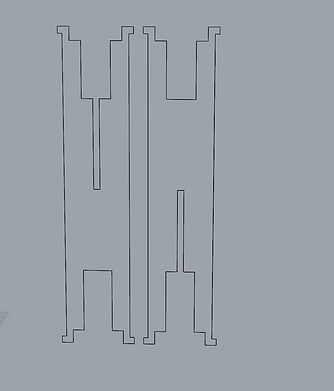
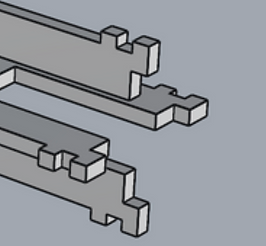
After lasercutting the first few spindle, I realised that I didn't really need that little key like shape so I removed it
Spindle Body Laser Cut
Prototype Assembly
We test cut two side and one top piece for the acrylic for our prototype from the scrap acrylic. We attached the spindle and an end cap to the acrylic using bolts and nuts, for the other end cap I attached it to the motor. We then attached the motor to the battery and voila, it spins.

We test print the first animation (shoutout to Faith for working on the first animation draft and Xin Yi for cutting the frame holders and helping with assembly). We then proceeded to assembly... and as expected these makeshift frame holders start to fall apart :'). The frames were slowly falling apart as we spin.


Frame Holder
Back to Rhino, I modelled the frame holders. I added a little kink so that it sits will in the end cap and will not drop out easily when the spindle spins. Curiosity killed Ray, wondering whether acrylic frame holders would work. However, we later found out that the acrylic was too rigid to rotate. The plastic sheet worked much better. Would like to thank Thea for the Cricut machine.
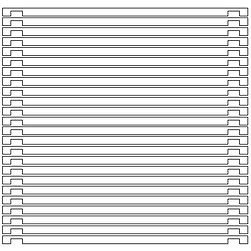
We cut the plastic frames from the NAFA file holder and proceeds to test the flip animation. However the plastic frame was too thin and the frames could not rotate properly on its own. So then we reprinted the frame holder with a slightly thicker plastic sheet and it was working well.

However there was a slight gap between our animation frames so we had to redesign the frame holders. We did so by adding a little height. (dimension = spaces between two holes / 2)


Frame Holder v2
Case
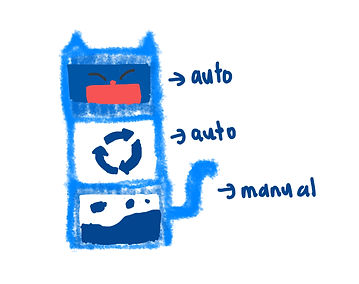
So for the case we wanted the design to be our Purrlastic bin so we will be stacking the 3 animations on top of each other together. We have decided on two auto and one manual for the mechanism.
We got the blue acrylic and started dryfitting everything. I added the little jigsaw edges such that the panels will fit together properly. We also added holes to allow the switch and the wires to be well hidden.
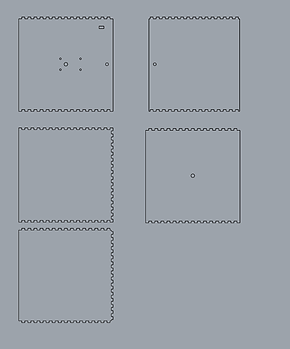

Panels for Laser Cutting (left)
Dryfit Panels (right)
3D Model
Motor
For the motor we had two different kinds. I accidentally bought one with dual motor so I had one shaft poking out... we shall figure out what to do with it later. As for the other one we got from Sim Lim. We also found out that both have different speeds. So we had to bear that in mind when splitting the animation accordingly.
Mounting
We bought a few long bolts and nuts from Daiso to secure the spindle to the case. After experimenting with different ways to attach it, I found that the most effective method was to firmly fasten the bolt and nut on one panel so the nut stays in place. The center hole, which the bolt passes through, is slightly larger - allowing the spindle to rotate freely.


We tested the casing with the animation drafts that Faith has kick-started. The sizes of the cases were perfect. How we felt that the animation appear a little dark as the spindle was a little too far back. We thought of installing LED lights also but there were some uncertainties as it could cast shadows etc. After studying the panels, we took the leap of faith to send it for trimming. We first marked which edge of the panel should be trimmed.

After marking, we then laid the faces of the panels in the same direction so that the laser can trim. Thankfully there were no issues while trimming the panels.
It was a great decision made as our Purrlastic bin was also more rectagular hence by cutting the panels, the flipbook casing resembles the bin shape more. More importantly the animation is more visible!
Manual Mechanism
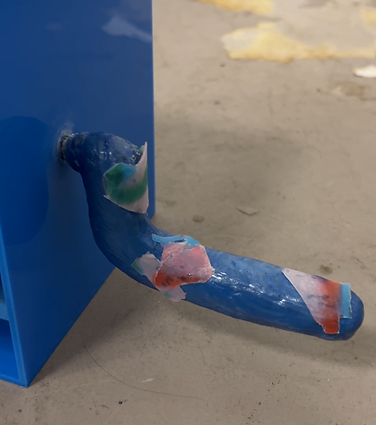
We found a random metal rod and deconstructed it to turn it into a manual handle. We then proceeded to wrap with air dry clay to shape it into a cat tail.
Case Design
Animation
We split our animation as follows:
1. Munching (Xin Yi)
2. Logo (Faith)
3. "Stomach" (Ray)
Shoutout to Faith for figuring out the AE file settings and doing the first animation draft for us. Teamwork makes the dream work and bring Purrla alive.
flipbook-animation
Trash Animation
The initial animation shows "food" dropping into recyclable and non-recyclable section. And as we progressed along with our bin design, our Purrla bin has developed too.
The lecturers feedback was that the animation wasn't as obvious. So I thought why not we try exaggerating the animation a little bit more. Our Purrlabin no longer has the division in recyclabes vs non-recyclables so I thought why not why not have food drop down into Purrla's stomach consecutively and maybe end with a Purrp.
Storyboard


There are a total of 8 items that I intend to animate. I also wanted the layers to animate back to back and staggered at the same time. I mainly played around with the position and rotation to make the drop animation come to live. Initially I wanted the items to drop down one by one however since the top animation was constant, I thought it makes more sense for it to stagger.

Staggered Animation Frame

Trash Animation
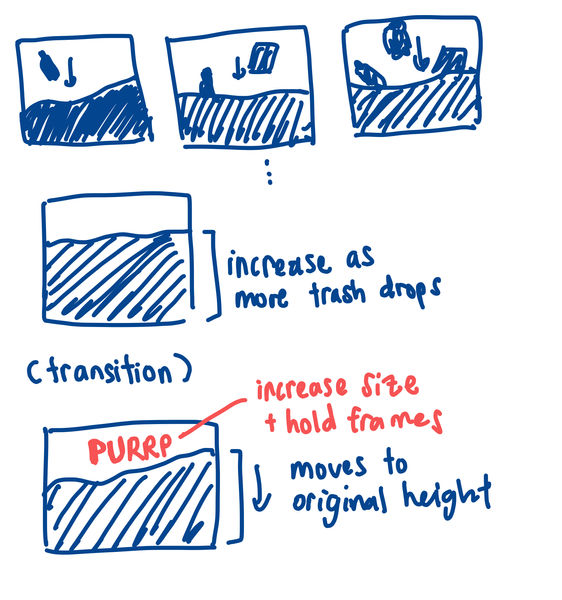
After editing the trash animation, I imported it into main composition where I could add the keyframes to make the animation loop. As the trash piled up, it adds height to the animation. I saw that as an opportunity for transition to loop back to the first frame.
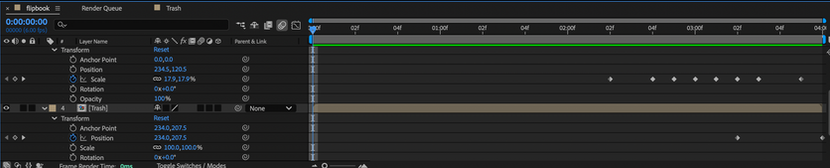
Towards the end of the animation, I adjusted the position of the trash elements, shifting them downward to align with the first frame for a smoother loop. I added keyframes at the final moments of the timeline to ensure this transition was clear. As for the “Purrp” text, I wanted it to hold its position for a few frames to make it more noticeable. Since I was working within a tight 4-second animation window, I had limited frames to work with, so I compressed the text animation into the last few frames to fit everything in. I also changed the colour of the text to pink so that it stands out abit more admist the blue.

I then replaced the frames into the Illustrator file that Faith has prepared which separates the top and bottom frames. We added 2mm in the middle where the fold line is as it will be folded over the plastic.


Print & Sticking Frames
So once we had each of our animation sorted, we proceeded to cut and paste each frame to the frame holders. Once done, I hang the frames onto the spindle holder. Look at that, the frame holders are also rotating about in the hole.
Plastic Decoration
We also wanted to add some decoration pieces. We collected plastic bottle caps and proceeded to melt them with the hair curler. Thank God we didn't burn anything and the result was so pretty
Step 1: Cutting Plastic Caps
The toughest step of the entire process, we were struggling with Faith's 5 year scissors and my pen knife that could cause casualties at any point of time. Meanwhile Ros walked over and showed us the way, Eureka moment right there. Grateful for all Ros, Ivan and Merissa for all the helplines along the way! <3
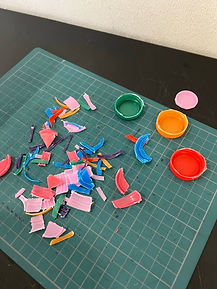
Step 2: Melting Plastic with Haircurler
We then heated the hair curler to 230 degrees, super high-tech-can-adjust-temperature haircurler that Xin Yi rarely use and now we are melting plastic with it. We laid a few plastic bits onto the baking paper and then laid another piece of baking paper and started "ironing".

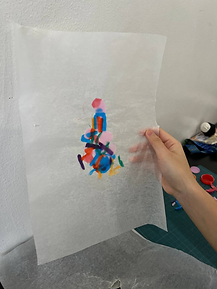
We let it cool and the end result are pretty intricate plastic pieces which we will then glue on the boxes as decorative pieces.

Once we had all the acrylic and animation frames ready, we began the assembly process by carefully attaching them onto the plastic frame structure. It was a meticulous process, but we were all working hard and excitedly bringing Purrla to life. After we assembled all the 24 frames, it felt like we saw the light at the end of the tunnel.
Final
final-flipbook
We worked together to assemble all of our boxes together and finally presenting to you our Purrla flipbook. Super proud of my groupmates for finishing this race together with me.
All our boxes stacked together! We used the faster motor for the munching animation and the slower motor for the logo animation as there are more animation frames for Faith's and we want it to be more visible.
The animation goes like this:
Purrla is eating plastic recyclables continuously and the loading animation represents "sorting in progress" and finally it drops to the belly and purrpppp, it gets digested.
Our Purrla bin is now alive.
With the cat tail crank attached, the manual mechanism is now fully functional. What makes it even more exciting is that the animation showing how quickly the food gets digested is entirely user-controlled. By turning the crank at their own pace, users can speed up or slow down the animation.
Working on the Purrlastic flipbook project has been such a rewarding and collaborative experience. I'm genuinely grateful to my meowvelous groupmates. Each of us brought something unique to the table, each of us contributed to a specific portion of the final piece. Our individual animations and the little factory that we set up at the back of the class that took up two tables to bring everything together, these brought Purrla to live.
Look at how cute is that, crafted by my beloved groupmates from the melted plastic that we made earlier.
bottom of page